
Next does not continue
Look for messages beneath required fields such as Topic or Learner Stage.
Complete or correct those fields, then select Next again.
An AI tool guides you through the details needed for a particular task. Open the tool, complete its required fields and review the resulting resource. The example below uses Advanced Math Worksheet; other tools ask for different inputs.
Open AI Tools and choose a tool suited to your task. For a maths practice resource, open Advanced Math Worksheet if it appears in your catalogue. Read the required fields before you start so you have the topic and learner level ready.
In the worksheet example, enter Topic and choose Learner Stage. Set Number of Problems if you have a particular length in mind. For another tool, use its own field labels and required-field markers rather than expecting the same form.
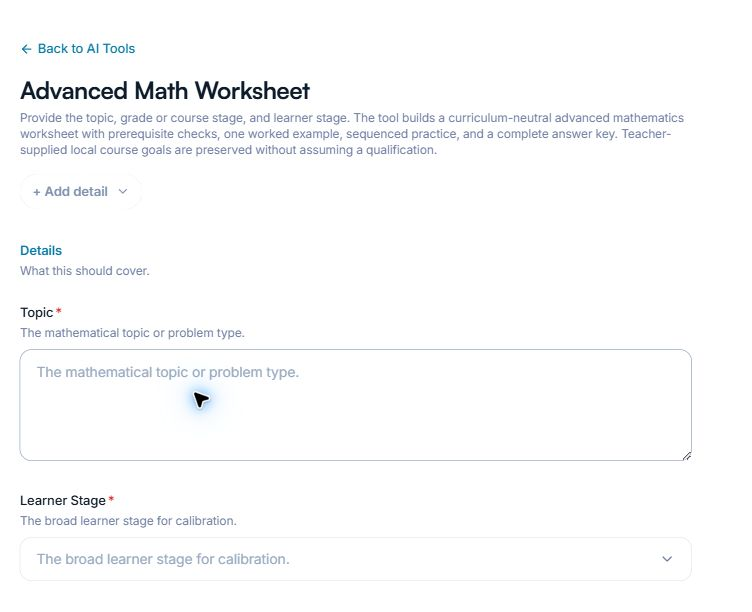
Describe the topic and choose the learner stage before continuing through the form.
Use Additional details for constraints such as prior knowledge, vocabulary or the kind of examples you want. Choose relevant class or Teaching Assistant context where the form offers it. Check these choices in the tool itself; do not assume your Chat settings supply every input.
In the worksheet example, select Next once the required inputs are complete. Wait for generation and read any validation message if the form cannot continue. When the result appears, open its editor or preview to inspect the whole resource.
For a worksheet, solve the questions and check the answer expectations, difficulty, notation and worked examples. For another resource, check facts, instructions, level and suitability. Correct the content in the editor or refine the inputs for another attempt when needed.
Save changes to the editable resource before leaving. Decide whether you want to keep a file copy in Resources, print or download it using the output’s available controls. Read the separate saving guide if you are unsure which version a control keeps.
You have a generated resource you can review, edit and save for the teaching task you described.
Look for messages beneath required fields such as Topic or Learner Stage.
Complete or correct those fields, then select Next again.
Check the level, topic and constraints you supplied.
Edit the draft or revise the brief. Do not share a resource solely because generation completed.
Tell the team what you were trying to do and what happened.
Contact support or send feedback